
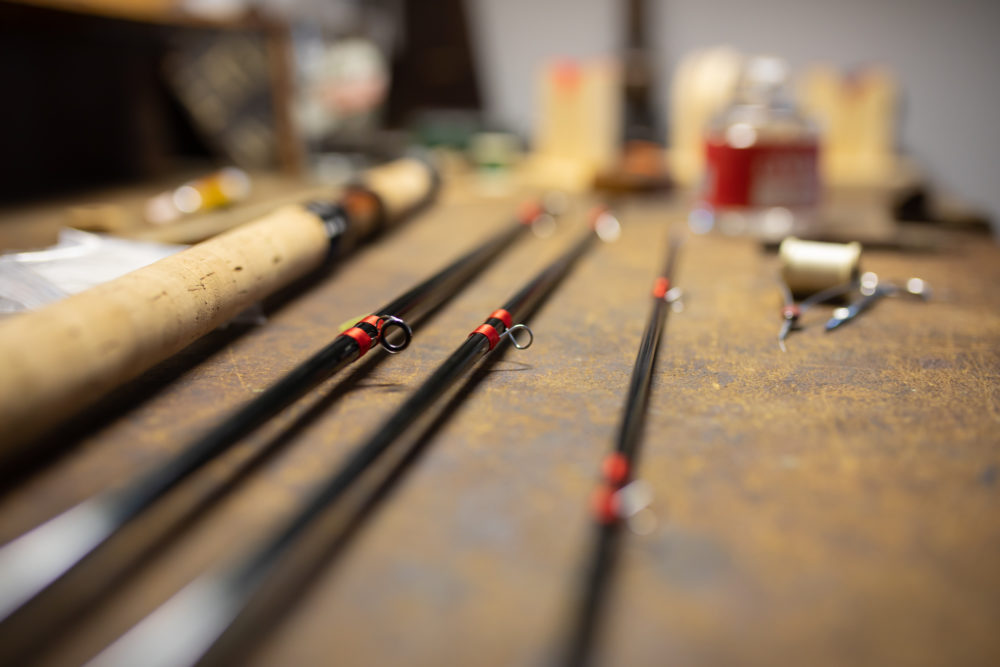
So you’ve decided to build a fly rod. That’s excellent — it will set you apart, and give you a new appreciation for the craft and history of the sport.
But now that you’ve decided to do it, you may be wondering: “Just how do I go about building this darn thing?” Good question! This article is designed to help you choose a rod, and to get set up with the right tools.
How to choose the right fly rod to build
This being the first fly rod you’re going to build, you have a lot of options — and I mean a lot. Whenever I face a problem like this, I like to narrow down the choice by asking myself a set of questions, the answers to which usually lead me in a direction that is suitable to me at that moment in time. In choosing a fly rod to build for the first time, I suggest you start by considering the following questions.
How much time do you have?
This is perhaps the single largest determining factor. My dad built and wrote about bamboo fly rods for years, and yet when I asked him how long it took to build a bamboo fly rod, he estimated it at approaching 100 hours. Consider that for a moment: it took someone who was an expert at his craft two and a half weeks of “desk-time-equivalent” (presuming a 40 hour work week), to build a rod. If you spread that out over a few hours a night, for some that could be daunting — for others, a joy.
Thankfully, building a rod from a graphite or glass blank takes much less work. Still, even that can get as technical and as time consuming as you’ll let it. For instance, if you have access to a lathe you can build your own reel seat or you can simply buy one. Similarly, you can buy pre-shaped cork grips or your can glue and shape your own.
For the purposes of my project, I knew I had to work this project around the commitments involved in my day job but that I had some weekend time to work on it. I also had access to a lathe, but not a ton of time to spend on it.
This was pointing me in the direction of a graphite blank, with a cork grip I would shape myself, but a reel seat I would buy off the shelf — a compromise, and not fully bespoke, but good for my purposes and something I could be proud of.
Note: Perhaps the most time-consuming part of building a rod from a blank is waiting for the varnish to dry in between coats. This is where, if you rush it, you can really mess it up. Much of this time is down-time, akin to the time you might spend waiting for a sourdough to rise, but you can’t rush it and so you’ll need to build it in. Trust me: putting a rod built for a trip into the trunk of a car for said trip while its still tacky is not, well, recommended.
How good are your fine motor skills?
This relates to the above question, but differs in that a finished rod will display both your strengths and, yes, your weaknesses. You’ll need to be honest with yourself upfront about what you’re capable of, and what you’re willing to tolerate in terms of shortcomings.
One handy rule of thumb is that the thicker the blank, the easier it will be to manipulate. At least, I personally find that to be true! So, if you’re wavering between, say, a 6/7 weight switch or a 9 weight Spey for your first rod to build, I’d go with the heavier one first.
In a practical application, consider this: once you glue cork onto your rod blank, it is glued on and, with the epoxy I use, there is absolutely no getting it off. Well, you can — but trust me, you sure don’t want to try. Building things in rod making is often permanent, or the fix of any mistake requires a huge commitment of time. In some areas, like handles, you might consider buying a pre-shaped handle, but in others you need to think through the choices first.
All of this is to say: just as you shouldn’t try to to fit a 100 hour project into two days, nor should you bite off more than you can chew. Be honest with yourself upfront to avoid disappointment later.
For me, I’m always critical of my finished product, but satisfied by the process. I try to accept these in balance.
Do you have access to power tools or a lathe?
Know what you’re getting into, and what certain decisions will require. Shaping a cork will require either a lathe or some advanced jerry-rigging of a hand-held drill (per this video). Assess what you have, and what you’re willing to buy, and buy your components accordingly.
What rod do you need most?
Unless you’re building this just for fun, perhaps this is the most important question. What rod do you actually need?
For me, I wanted a versatile Spey rod for big water. I already have an 11 weight Spey that pushes 15′, so I didn’t want something that big. I was looking for 9 weight with a lot of backbone.
I landed on the Sage X 8140-4 as my blank on the advice of Topher Browne. It was a decision, I would later learn, that I would never come to regret.
How to procure a blank
So you’ve decided to build a rod, and chosen the rod. Now how do you buy it?
That’s pretty simple. Most rod companies will sell you their blanks directly. For instance, you can buy Sage blanks here on their website.
You’ll see the rods are available at a good discount. If the Sage X costs, say, $1,200 fully built, you can buy the blank for $550 or so online. Sure, it’ll cost you your time and some materials, but that’s a darn good discount.
You can also find blanks at a variety of other online stores Here’s just a few:
You can also order them through your local friendly fly shop!
So dive in, choose and buy a blank, and in the next article we’ll talk about the hardware and tools for building the rod!
Comments are closed